
With the current society requirements for social distancing, video conferencing is becoming the new normal, and will probably continue into the foreseeable future.
Video conferencing is much more enjoyable for you and others if some preparation is provided. As you become more used to video conferencing and it becomes more of a necessity, you can gradually update parts of your system to improve your experience.
Location, location, location.
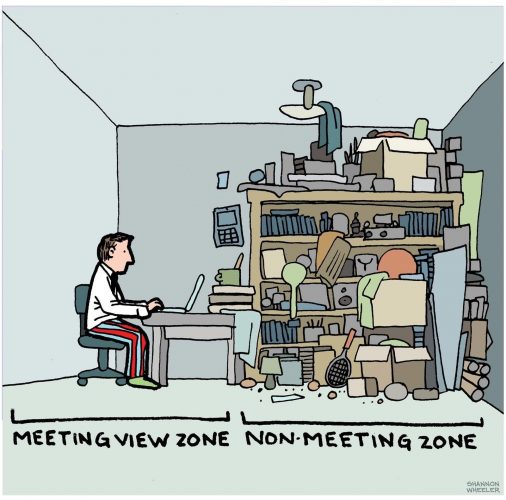
Find a space in the home that is free of visual distractions. Although popular software has virtual background options, they can look artificial and be themselves distracting. Ideally, find a place that doesn’t have a lot of hard surfaces. Sound bounces off hard surfaces creating an echo that can make your voice hard for others to hear. Sit upright at a desk or table to ensure a consistent setup, and good posture.
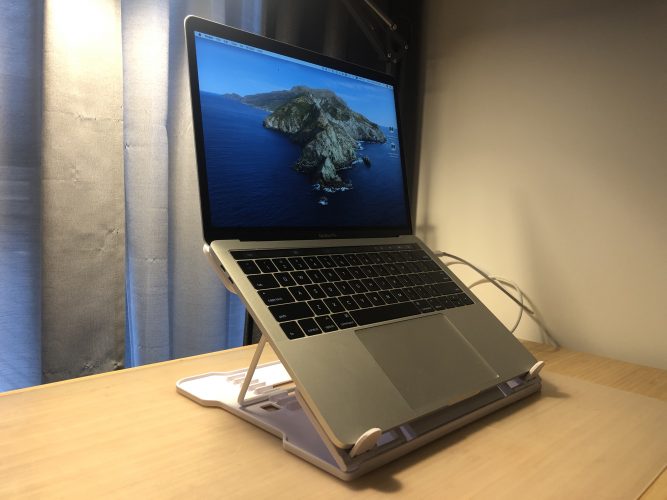
Choose your device wisely
Use a computer with a built in camera or a seperate webcam mounted to the display if possible. A laptop computer may benefit from using a laptop riser to improve the height of the camera.
As fantastic as modern phone cameras are, the screen format is often not ideal, especially when participating in group meetings. The viewpoint from a handheld phone will not be ideal for viewers. If you do use a mobile device, setup and composition is very important.
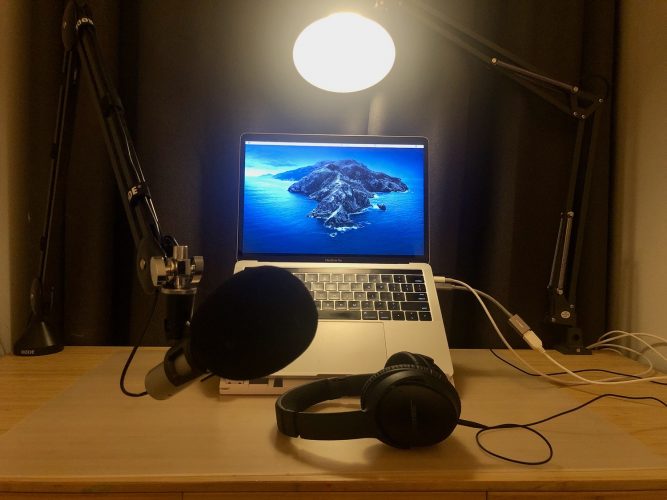
Light is up
Lighting is important for any video. Illuminate your face with a forward facing light, and use another light source behind you to seperate yourself from the background. The front light can be a window during the day, combined with a lamp if required. A well positioned front light is definitely required at night. The front light should be located behind your camera to avoid washing out the video, and effectively illuminating your face.
Mic up
Built in computer microphones are typically very average. Try using an external USB microphone mounted on a stand, or desk-mounted boom arm. If using a mobile device, use a headset that integrates earphones and a microphone.
Listen up
Use headphones to monitor your voice, and to hear others. You can easily make necessary adjustments when you can hear your own voice. Closed-back headphones, or noise cancelling headphones limit background noise that can be distracting.
Applications
Familiarise yourself with the application that your meeting uses. You may need to download an app and register as a user. Each app is a little different to set up, and will allow you to test video and audio settings. Practice using the app and understand how to mute the microphone, and video when required.
Dress up
Be sure to look the part, as you would in person for a meeting, ensuring that you are appropriately groomed and dressed.
Compose yourself
Ensure your computer camera is located at head height, with your front light locates behind the camera. Your video image should show your upper body and head. Think about how you see a television newsreader on screen.

If you must use a mobile device, mount it in a compatible bracket, on a tripod or similar, to be a head height. Avoid resting your device up against something or holding it in your hand – this will produce an unflattering image of a view up your nostrils.
Lights, camera, action
When the time comes to connect into your meeting, be prepared to check in a little early. A meeting host should allow to to join the meeting a few minutes early. Having already tested your composition, video and audio prior to the meeting, ensure your microphone is muted as you connect in.
Enjoy
A good video meeting setup will provide the foundation of a good experience, and give you confidence to interact with others. Once you get into your meeting, be yourself, as you would in a normal meeting. Take note of who does it well, and who may need improvement, for your own improvement. With practice, you will improve your video meeting technique to be a video conference pro.